One Pan Zucchini "Pasta" Bake with Ragu Homestyle

Even though I'm not Italian, pasta was a MAJOR staple in my household growing up. And my mom always used Ragu when making anything Italian. I'm pretty sure all of my favorite meals as a child included Ragu - baked ziti, spaghetti and meatballs, you name it! So when I heard that they were coming out with a new Homestyle line, I was super excited. I headed to the store, and picked up the Thick & Hearty Roasted Garlic sauce, just one of many of their delicious sauce flavors. 

I didn't even know what I wanted to make at first, but I knew that I had to try this sauce. Plus I'm obsessed with garlic, so it was really a no brainer. I got to thinking and figured since I was having a little twist on the sauce I knew growing up, I'd use it with a twist on the traditional pasta meal. I decided to go with zucchini and summer squash pasta instead 1) to keep it a little healthier and 2) because it's summer! No better way to get the best of both worlds than with some summer veggies and a delicious, hearty pasta dish.

Here's what you'll need:

-1 zucchini, spiralized using the ribbon blade
-1 summer squash, spiralized using the ribbon blade
-1 cup Ragu Homestyle Thick & Hearty Roasted Garlic tomato sauce
-5.3 oz cottage cheese
-1/4 cup shredded parmesan cheese
-1/2 tsp oregano
-1/2 tsp basil
-1 clove garlic, chopped
-1 tbsp EVOO
-Sea salt and pepper to taste

Serves 2

Instructions:

1) Preheat your oven to 400 degrees. 
2) In a cast iron skillet, heat up the olive oil on the stove top over medium high heat.
3) Once the oil is glistening, add in the garlic and cook for 1 minute.
4) Add in the zucchini and summer squash ribbons, and cook for about 3-5 minutes mixing regularly.
5) In the meantime, mix together the cottage cheese, oregano, basil, sea salt, pepper, and Ragu Homestyle sauce in a bowl.
6) Mix the sauce mixture into the pan, and top everything evenly with the parmesan cheese.
7) Move the skillet into the preheated oven, and cook for 10-15 minutes.
8) Remove the skillet from the oven, and let it cool for about 5 minutes.
9) Serve, and enjoy!

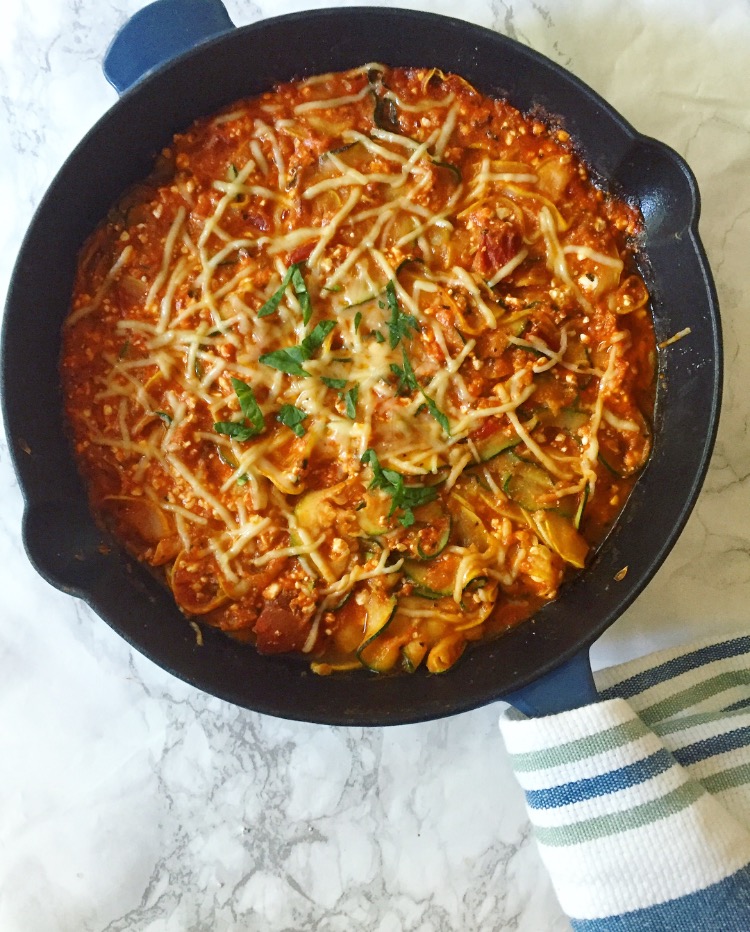
It honestly tastes JUST like pasta, but better! Plus it's super easy and fast to make and has minimal, delicious ingredients. It gave me all the feels of growing up but with a kick! That hearty, garlic flavor is just so perfect! I can't wait to give the other flavors a try. For other tasty recipes from Ragu themselves click here.

Ragu .jpg

Vegan Stuffed Poblanos (GF)

I headed to a local farm market yesterday afternoon with my niece. She gets to a point where she is just sick of being in the house (totally understandable), so she will find her shoes and come up to me and say, "GO". She's just under 18 months, so vocabulary is limited. But I'm pretty sure I've got this one figured out. Plus she's basically shoving her shoes in my face, so we put them on and do what she says, go.

Unfortunately it's been about 9723753892 degrees the past week or so, so the last thing I want to do is take her for a walk in her stroller. There are also limited places that I really want to take an 18 month old indoors, so I thought we could try this local farm that has a small market. I've taken her before. We spend 15-20 minutes looking at animals going over which is which. I let her walk about 5 feet until she tries to run away, and then I have to carry her to the little market.

But yesterday we got to the market, and I was already sweating. We walked over to the animals (half of whom were hiding in the barn because it was hot AF), she said goat, I took that as my cue to pretend I heard "go", and we headed to the farm's market. Seriously SUCH a relief! Once in the store, I felt obligated to buy something, but to my pleasure there was TONS of organic greens and other produce. I spotted some poblanos and instantly had a plan for these babies. So long story short, everything happens for a reason? I don't know. How about always say yes to organic, local poblanos.

Here's What You'll Need:

-4 poblano peppers
-2 cloves garlic, minced
-1/4 red onion, chopped
-8 oz cooked quinoa
-One 15.5 oz can chickpeas
-1 tsp cumin
-1/2 tsp Himalayan sea salt
-1/4 tsp black pepper
-2 tbsp olive oil, separated
-3/4 cup Herb 'n Zest tomato chive cooking sauce
-Salsa (optional)
-2 tbsp green onion, chopped (optional)

Serves 2-4

Instructions:

1) Turn your oven onto broil on high.Coat the poblanos in 1 tbsp olive oil. Cook the poblanos for 3-5 minutes per side until skin starts to blister.
2) Remove them from the oven, and switch it to bake at 375 degrees. Let the peppers cool. Once cool, remove the blistered parts of skin.
3) Use a small knife to remove the stem of the poblanos and make a slit down one side. 
4) In a skillet on the stove top, heat up 1 tbsp of olive oil over medium high heat.
5) Add in the garlic and red onion and allow to cook down for about 3 minutes.
6) In the meantime, strain and rinse the chickpeas. 
7) Add the chickpeas to the onion and garlic and cook for about 5 minutes.
8) Add in the sauce, cumin, salt, and pepper and cook until the sauce is heated (about 3 minutes).
9) Mix in the quinoa, and cook for an additional 2-3 minutes. Remove from heat.
10) Equally distribute the filling to stuff each pepper.
11) Place, the peppers in a lightly greased baking pan, cover with aluminum foil, and cook for 10 minutes.
12) Take the peppers out, remove the foil, add any salsa if desired, and place the pan back into the oven (uncovered) for an additional 10 minutes.
13) Remove the pan from the oven, plate the peppers, top with green onions if desired, and enjoy!

Besides the obvious subject (poblanos), the real star of the show is this Herb 'n Zest tomato chive cooking sauce. This is just one of MANY ways you can use this delicious sauce. All of their sauces and condiments are vegan, gluten free, and use non-gmo ingredients. If you'd like give them a try, you can use the code GET25ARLTH to get 25% off their home chef starter pack which includes 6 sauces. You can click the picture below to go straight to checkout.

If you use this code, you'll be entered into their summer giveaway worth $50 if you post a picture of yourself with a jar of Herb 'n Zest to Instagram and tag it with the hashtag #herbnzest. The winner will be selected 8/15/16.

I honestly LOVE these sauces (or I wouldn't recommend them), so the home chef start pack is a great way to give them a try! Plus who doesn't love the chance to win a giveaway?

Chocolate Banana Superfood Pancakes (GF)

Is there anything better than a nice stack of pancakes to start the morning off? Yes, actually there is - chocolate banana superfood pancakes because we all know that there is no better way to start the day than with some chocolate (especially when it involves bananas and peanut butter).

Let me tell you guys a little about Ka'Chava. They make a whole body meal powder that is packed with 70 superfoods and nutrients. It's also vegan, gluten free, dairy free, soy free, and I could really go on and on. You should really go check out their website to learn all about this delicious powder that's perfect in smoothies, waffles, and in this case pancakes. You can also use the code allroadshealthy10 for a $10 store credit while you're there!

So back to the recipe. Chocolate is great, but superfood packed pancakes? That's an entire other level. Plus they're just plain delicious. Top them with caramelized bananas and PB like I did or whatever you're craving. There's really no bad way to eat a stack!

Here's What You'll Need:

-1 cup quinoa flour
-1 tsp baking powder
-1 scoop chocolate Ka'Chava 
-1 egg
-1/2 cup water
-1/4 cup unsweetened almond milk
-1/2 banana

Serves 2-4 (makes about 12 small pancakes)

Instructions:

1) In a large bowl, mix together the dry ingredients (flour, baking powder, Ka'Chava powder).
2) In a smaller bowl, mash the banana, and mix it with the egg.
3) Add the egg and banana mixture to the dry ingredients along with the water and almond milk. Mix until smooth.
4) Heat a pan over medium high heat. Coat with cooking oil of choice (coconut oil or ghee is recommended).
5) Ladle out 3 small circular pancakes into the pan. Cook for about 3 minutes (give or take) per side until the edges turn a lighter color and form small bubble like other pancakes. 
6) Flip the pancakes and cook for an additional 3 or so minutes. Continue until all of the batter is used.
7) Serve the pancakes, and top them with your favorite topping. 
8) Enjoy!

These babies are good on their own, but toppings are never a bad idea! Let me know what toppings you used on yours and what you think in the comments below! 

Good Clean Summer Love Pasta Salad with Love Beets and Organic Girl

I don't know about you guys, but I LOVE me some beets and organic greens! So when Love Beets and Organic Girl let me in on their #GoodCleanSummerLove campaign, I was SO excited to play around!

Before we get into the recipe deets, let me tell you guys about this amazing contest. One lucky winner is going to win an entire year's supply of Love Beets and Organic Girl (insert heart eyes and hand raising emoji here)! I'll put the full details on how to enter at the bottom of this post, so make sure you check it out!

So back to the eats. Beets and greens scream summer to me (hence the campaign I'm guessing), and of course they both go great in a salad. But I decided I wanted to kick it up a level. What else screams summer? Grilling, corn, and pasta salads. So why not bring them all together? Trust me you want to bring them all together...

Here's What You'll Need:

-1 lb pasta, cooked (I used sprouted penne, but lentil or whole grain pastas are also great)
-2 cups Organic Girl pepper greens
-4 Love Beets organic cooked beets, chopped
-1/4 cup Organic Girl pomegranate balsamic dressing
-3/4 cup feta
-2 ears of corn
-1 tbsp olive oil
-1/4 cup pine nuts
-Sea Salt and pepper to taste

Instructions:

1) Preheat your grill to medium high heat.
2) Remove the silk from the corn and pull down the husks. Coat the corn in olive oil, salt, and pepper. Replace the husks back up around the corn.
3) Grill the corn for about 20 minutes, rotating 1/4 of the way every 5 minutes.
4) Once cooked, shave the kernels off the cob using a knife.
5) Toast the pine nuts on the stove top until just golden brown (about 3-5 minutes).
6) In a large bowl, mix together the pasta, beets, pepper greens, corn, pine nuts, and feta.
7) Add in the dressing (and salt and pepper to taste) and mix completely until evenly distributed.
8) Serve and enjoy!

This pasta salad is literally like summer in side dish form. It's perfect for a picnic, bbq, or even as a meal through out the week. Let me know what you think in the comments, and make sure to check on the contest rules below.
 

Pipcorn Dessert Bars

I was recently introduced to Pipcorn, delicious, mini popcorn that is all natural, gluten free, and non-gmo just to name a few. It's so delicious (like please hide it from me or I will eat it ALL delicious) and not to mention cute! So I decided to play around with it.

Instantly I thought to go the savory route because that's just how I'm wired, but then I thought maybe I should challenge myself a little. I pretty much never share dessert recipes on here (something I need to change), so I figured why not! The Sea Salt Pipcorn would pair perfectly with some sweet goodies, so why not make it all into a bar. This bar is packed with flavor and the perfect snack or dessert. Bring it to your next party, and it'll definitely be a crowd pleaser!

Here's What You'll Need:

-4 cups Sea Salt Pipcorn
-1 cup dried (sour) cherries
-1 cup Purely Pecans roasted pecans, chopped
-1/4 cup Wedderspoon Manuka Honey
-8 squares Alter Eco Dark Salted Burnt Caramel Chocolate, separated

Instructions:

1) Chop up 5 of the chocolate squares.
2) In a bowl, mix together the Pipcorn, cherries, pecans, and chopped chocolate pieces.
3) Add in the honey and mix completely so that it is evenly dispersed.
4) Line a rectangular baking sheet or dish with wax or parchment paper (using a smaller dish/pan 7-8" by 10-12" is the way to go because you want to the mixture to entirely cover the bottom).
5) Pour the the mixture into the dish, and evenly ditribute it with a spatula.
6) Pop the dish into the freezer for at least 30 minutes.
7) Melt the remaining dark chocolate pieces on the stove top or in the microwave. Be very careful not to burn it.
8) Remove the dish from the freezer, and drizzle the melted chocolate all over the top.
9) Place back in the freezer for at least another 30 minutes.
10) Remove from the freezer, cut the mix into bars, and serve.

This combination of flavors is just perfect, and it really gives a different, healthier dessert option. They're also a great snack! if you let the bars warm at room temperature for a bit, they also turn into a delicious trail mix-like snack. Let me know what you think in the comments below!