Zoodles with Grilled Chicken in a Vegan Basil Cream Sauce + Rainstorm Wines

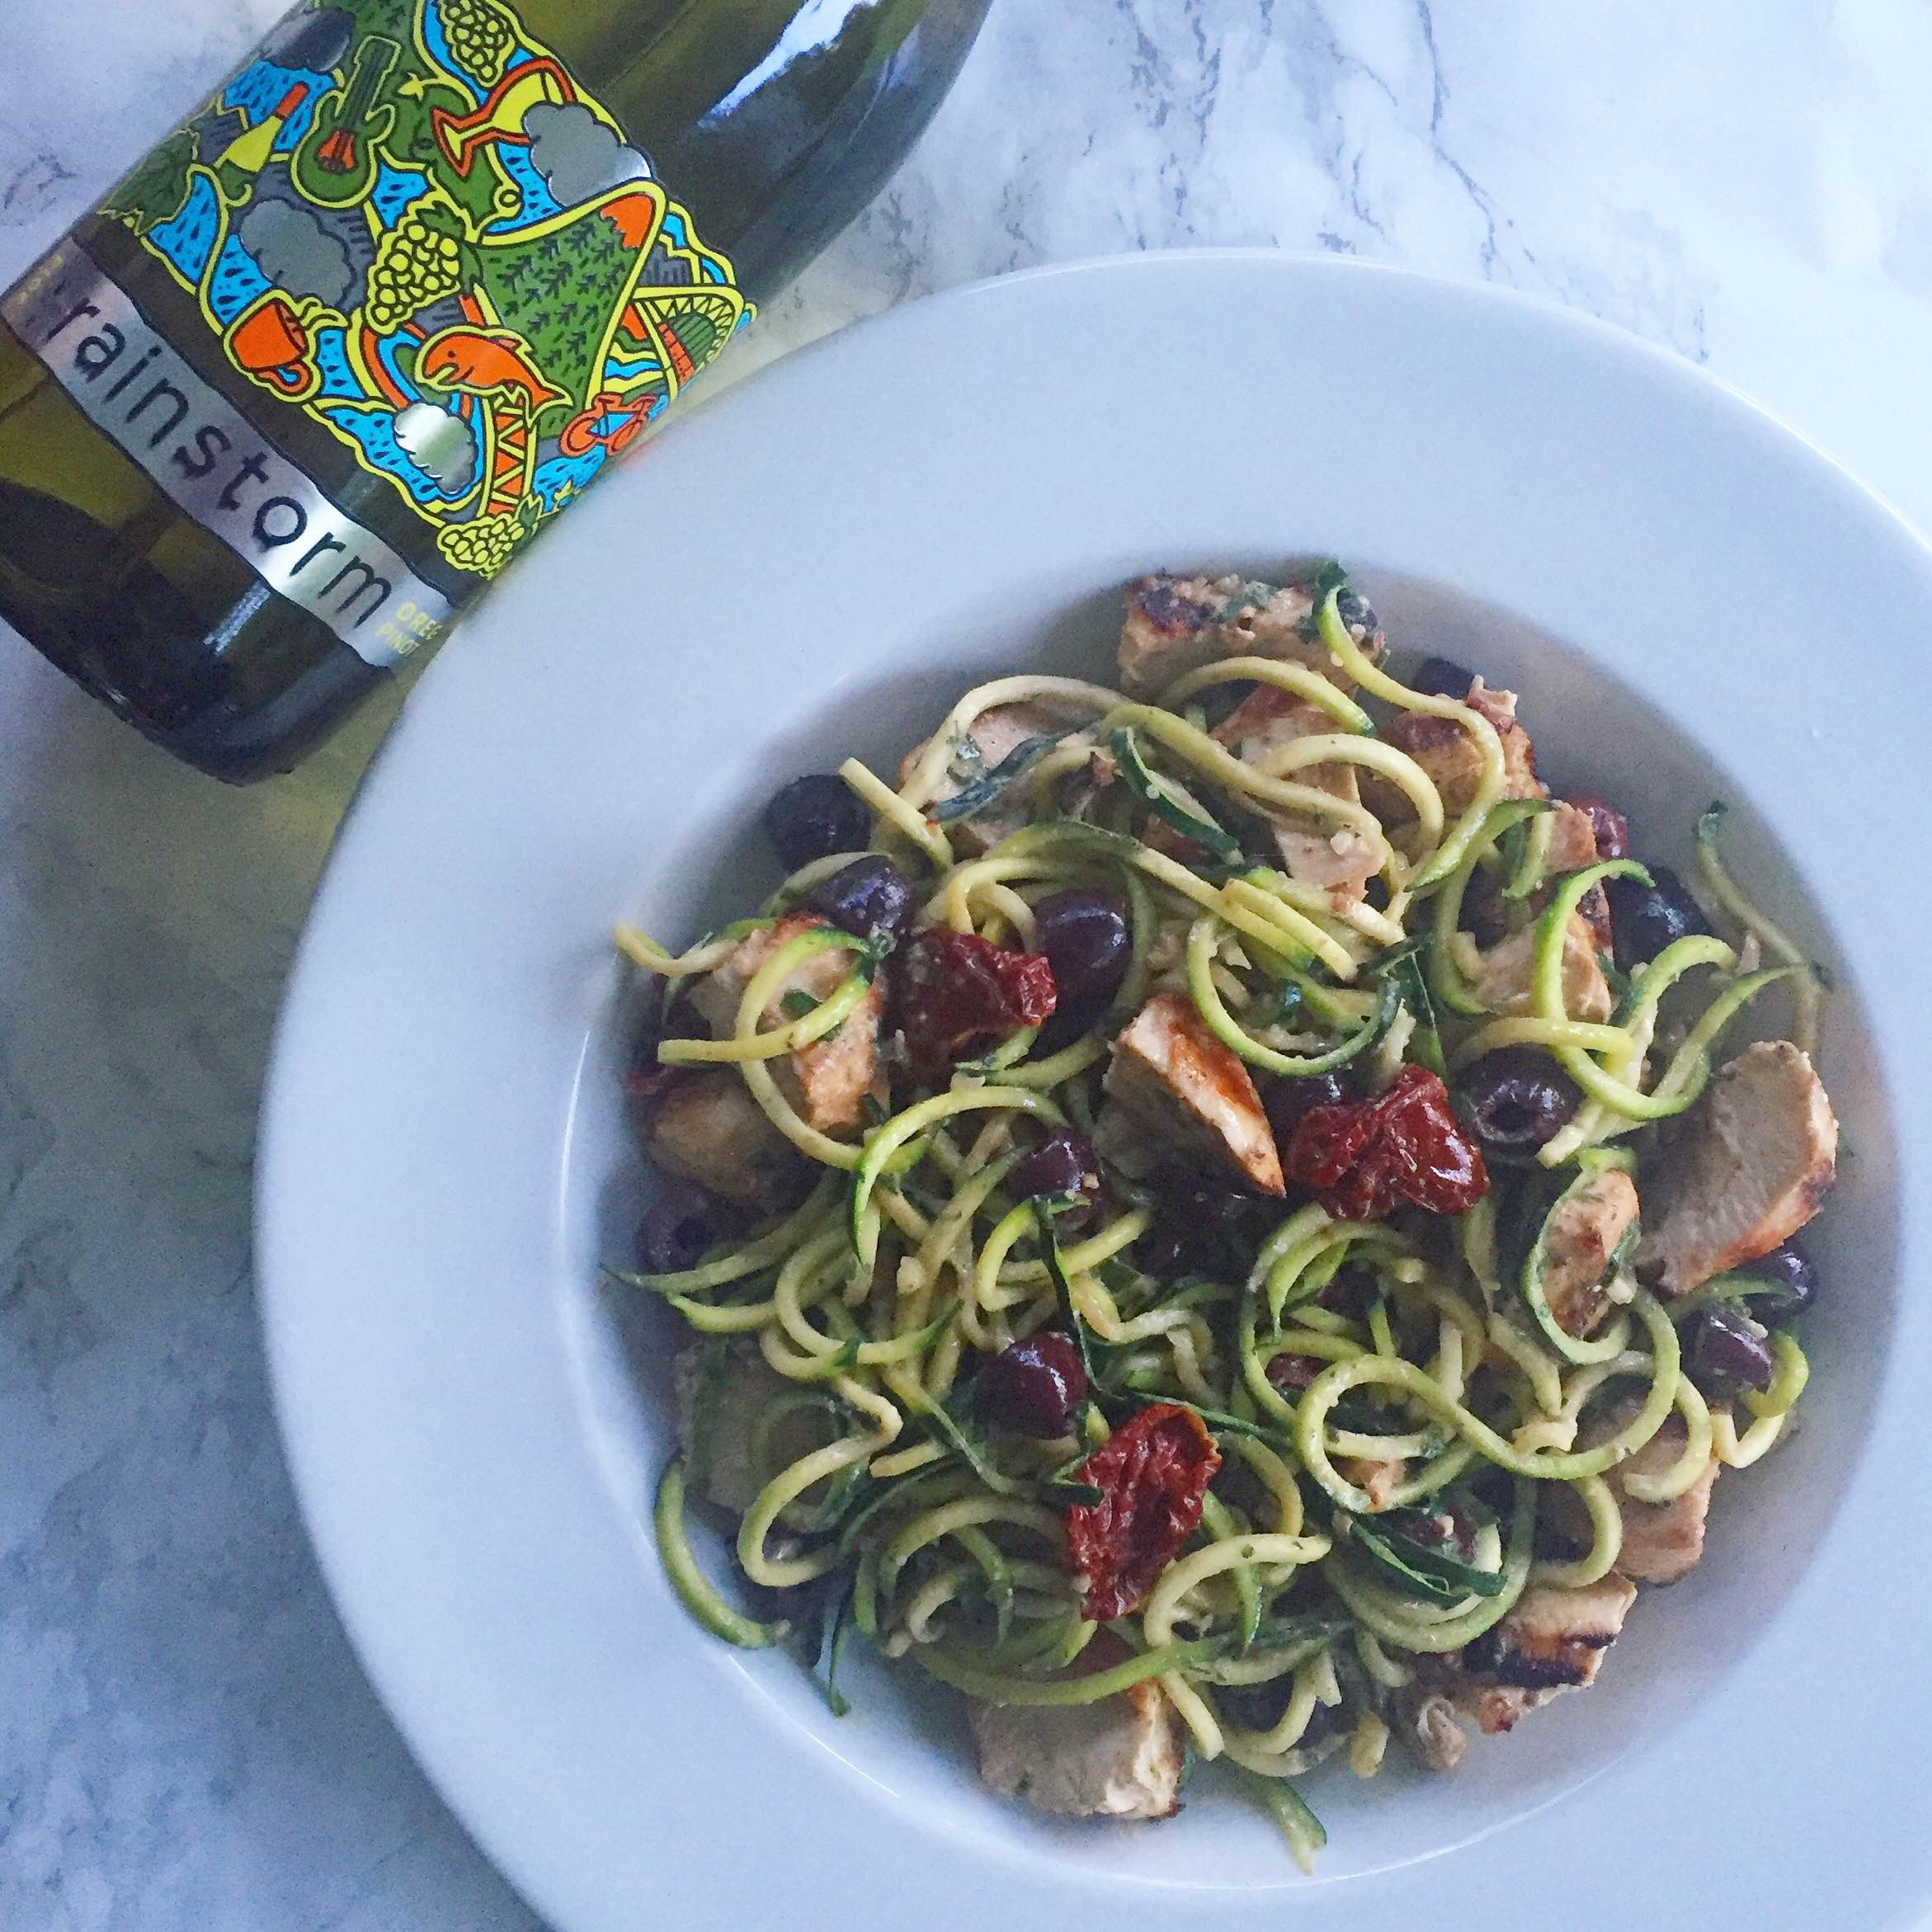
 Summer officially means zucchini season in my mind. It also means grilling season, so what better way to celebrate both than will a spiralized zucchini and grilled chicken dish. 

I decided I wanted to go a pesto-ish route because 1) I had basil and 2) pesto is freaking delicious. Instead of using raw nuts, I decided to go with the Artisana Organics walnut butter I had and make into more of a "cream" sauce. Toss in some sundried tomatoes and olives, pour yourself a nice big glass of Rainstorm Wines pinot grigio, and we have ourselves the perfect summery, spiralized meal.

Here's What You'll Need:

-1 zucchini, spiralized
-1/4 cup kalamata olives, halved
-1/4 cup sundried tomatoes
-1 chicken breast, grilled and sliced
-2 tbsp Artisana Organics raw walnut butter
-8-10 basil leaves
-2 tbsp olive oil, separated
-2 cloves garlic, minced and separated
-1 tsp lemon juice
-Salt and pepper to taste

Serves 1

Instructions:

1) In a food processor or blender, mix together the walnut butter, basil, 1 tbsp olive oil, 1 clove garlic, lemon juice, salt and pepper to make a creamy sauce.
2) On the stove top heat up 1 tbsp olive oil in a pan over medium heat.
3) Add in one clove of minced garlic and cook for 1-2 minutes.
4) Add in the spiralized zucchini and cook for 3-5 minutes, long enough to just heat the zucchini without cooking it down too much.
5) Add in the olives, chicken, and tomatoes.
6) Add in the sauce and mix everything completely, cooking for an additional minute.
7) Remove from heat, serve, and enjoy!

I paired mine with a nice refreshing glass of Rainstorm Wines pinot gris. It was the perfect compliment to this meal. It has a nice rich fruity flavor that played perfectly off the "creamy" sauce. Also zucchini and white wine just go hand in hand in my opinion, so I definitely recommend this combo!

Let me know what you think in the comments below.


Salmon, Onion, Arugula, and Caper Frittata

I very recently used my first cast iron skillet. I know, I know what the hell took me so long? All I have to say is I don't know, and can't we just pretend this didn't happen and you don't know this about me? I'll bring you some yummy cast iron recipes if we can just keep this on the down low... Okay cool.

But seriously, this has been a total life changer. I won this skillet in one of my favorite lady's, Savoring the Flavoring, giveaway. So I pretty much owe her my first born child. All I want to do is cook frittatas and skillet cookies and basically anything that requires being cooked on the stove top and then in the oven. Which brings me to this salmon, onion, arugula, and caper frittata.

Here's What You'll Need:

-6 eggs (ideally pasture raised, organic)
-1/4 cup the milk of your choosing (I went with unsweetened almond milk)
-3 oz cooked salmon (I used grilled salmon from the night before, smoked or baked are also good options)
-3/4 cup arugula
-1/4 chopped onion
-1/4 cup capers
-2 tbsp Fourth and Heart California Garlic Ghee, separated

Serves 4

Instructions:

1) Whisk together the six eggs and milk in a bowl.
2) Heat up 1 tbsp ghee in your cast iron skillet over medium heat and coat the entire pan (so the frittata won't stick).
3) Toss in the onions and cook down for 2-3 minutes mixing regularly to cook evenly and distribute the onion.
4) Add in the second tablespoon of ghee and let it melt.
5) Chop up the cooked salmon and evenly distribute it around the skillet.
6) Toss in the arugula, evenly distributing.
7) Evenly pour in the egg mixture, tilting the skillet to spread it all over.
8) Evenly add in the capers.
9) Cover with a lid and cook for about 3-5 until the sides of the frittata start to cook and stick.
10) Remove the lid, and throw the skillet into the oven on broil and cook until the frittata is fully cooked and a golden brown color on the top (about 5 minutes).
11) Remove from the oven, cut into 4 even pieces, and enjoy!

I topped mine with some sriracha because I like it spicy, but this combo is perfect on its own. Let me know what you think in the comments below!

Caprese Pasta Salad

I have been SERIOUSLY slacking on the recipe front, and I totally apologize for that! But I'm back and just in time for Memorial Day Weekend! I'm hoping to get up a few different ideas throughout this week that you can bring to/make for any upcoming picnics and parties you might be attending over the long weekend. Starting it off with this super easy caprese pasta salad.

Here's What You'll Need:

-One 10 oz bag of penne (I used Modern Table Meals' mixed lentil penne)
-16 oz fresh mozzarella (I used two Buf Creamery containers), cut into cubes
-2 medium tomatoes, chopped
-10 basil leaves, chopped
-1/2 cup balsamic vinnegar
-2 tbsp olive oil
-Salt and pepper to taste

Instructions:

1) Cook your pasta according to the instructions. Let cool until it reaches around room temperature, or you can just toss it in the fridge.
2) In a large bowl, mix together the tomato, penne, basil, and mozzarella.
3) Drizzle with the balsamic and olive oil and top with salt and pepper.
4) Enjoy!

I told you it was easy! And it's sure to be a crowd pleaser! Let me know what you think in the comments below!

Gluten Free Blueberry Cottage Cheese Waffles

Another week, another waffle (sorry not sorry). I just can't help myself, you guys! So believe it or not, this week I didn't spend multiple days dreaming about waffles. I actually didn't think about them until Tuesday night when I was like oh crap tomorrow's Wednesday! I thought about remaking one of my favorites, but first I started going through was I had in the fridge. Nothing stood out until I thought about cottage cheese. It's kind of like a middle ground between milk and cheese, and I've used both in waffles before. Toss in some fruit to offset the saltiness, and we have ourselves a waffle!

After I made these my mom actually told me that she used to have cottage cheese pancakes as a kid. I didn't even know that was a thing, but after making these waffles I can definitely see why!

Here's What You'll Need:

-1/2 cup quinoa flour
-One 5.3 oz container of cottage cheese
-2 eggs
-Pinch of sea salt
-1 tbsp coconut oil, melted
-1/2 tsp vanilla
-1/2 cup blueberries

Makes 2 waffles

Instructions:

1) Mix all of the ingredients except the blueberries together in a bowl.
2) Add in the blueberries and continue to mix.
3) Pour half of the batter into the waffle maker and cook according to waffle maker instructions.
4) Repeat with the second half of the batter.
5) Top with desired toppings, and enjoy!

Just a fair warning, this mixture is less thick that typical waffle recipes, at least ones that I've made. So when you're pouring it into the waffle maker, don't worry! It's just a totally different, lighter consistency because of the cottage cheese, but trust me that it will turn out delicious!

I topped mine with a few additional blueberries and some of my favorite granola. There wasn't even a need for syrup or honey between the flavors of the waffle itself and the toppings!

Let me know what you think in the comments below!

Gluten Free and Vegan Chocolate Chunk Almond Butter Banana Bread and French Toast

I'm pretty sure it must be a written rule somewhere that if it's a rainy day and you have ripe bananas, you need to make banana bread. Well, at least it should be a rule. Baking and rainy days are pretty much a must, and ripe bananas obviously mean banana bread. So banana bread it was!

I recently started using the Neat Egg (as I mentioned previously) as an egg replacement in some of my recipes. It has actually been wonderful! I'm not personally vegan, but my mom is. So it's nice to be able to bake something that I can actually offer her a piece of. Plus, you really can't even tell that there isn't an egg in the recipe, so the non-vegans will never know. 

I was fortunate enough to be able to team up with Neat over on my Instagram to give one lucky winner a full Neat prize pack which includes the Neat Egg and two Neat meat replacement mixes (original and Mexican). You still have a little time to enter (about 2 hours), so go check it out! In the meantime, let's get to the recipe!

Here's What You'll Need:

-3 ripe bananas
-1 Neat Egg
-1 1/2 cup unsweetened almond milk
-3 tbsp Gone Nuts Date Me almond butter
-1 cup coconut flour
-1 tbsp baking powder
-Pinch of sea salt
-1/2 of a 3 oz dark chocolate bar (I used an 88% cocoa bar, but that may be a bit bitter for some. Use whatever you like), broken into small chunks

Instructions:

1) Preheat your oven to 350 degrees.
2) Using a small hand mixer (or a KitchenAid style mixer works just as well),  mix together all of the ingredients except the chocolate chunks.
3) Fold the chocolate chunks into the mixture using a wooden spoon.
4) Pour the mix into a loaf pan that is either lined with parchment or sprayed with nonstick spray.
5) Bake for about 1 hour. Ovens may vary, so keep an eye on the bread. When it's ready the top should be golden brown.
6) Remove the bread from the oven, and let it cool completely before removing it from the pan.
7) Once cool, you can remove the bread and slice it.
8) Top with some additional Gone Nuts or the toppings of your choice, and enjoy!

A few things about the bread, there aren't a lot of added sweeteners like sugar or maple syrup because the Gone Nuts almond butter contains dates, vanilla, and coconut oil. If you're swapping out for a different brand, especially an unsweetened almond butter, definitely take this into consideration. I also didn't want an overly sweet bread because you can always add more almond butter or sweet toppings, but you can't take it out. If you prefer really sweet, feel free to add in some maple syrup or the sweetener of your choosing!

I also ended up using the bread to make some delicious gluten free and vegan French toast which I highly recommend! All you need is about 1/2 cup unsweetened almond milk, 1 tsp maple syrup, 1 tsp quinoa flour, 2 tsp nutritional yeast, and 1/2 tsp of cinnamon. Mix it all together in a bowl, and dip the banana bread slices into the mixture. Cook the slices in a pan on the stove top over medium to medium high heat, flipping half way through until each side is a golden brown. I topped mine with some maple syrup and more Gone Nuts, and it was SO GOOD.

Let me know if you give it a try and what you think in the comments below!